Manual
Main Menu
Choose your language on the top left of the screen.
Click on “Open Design File” to load an embroidery design.
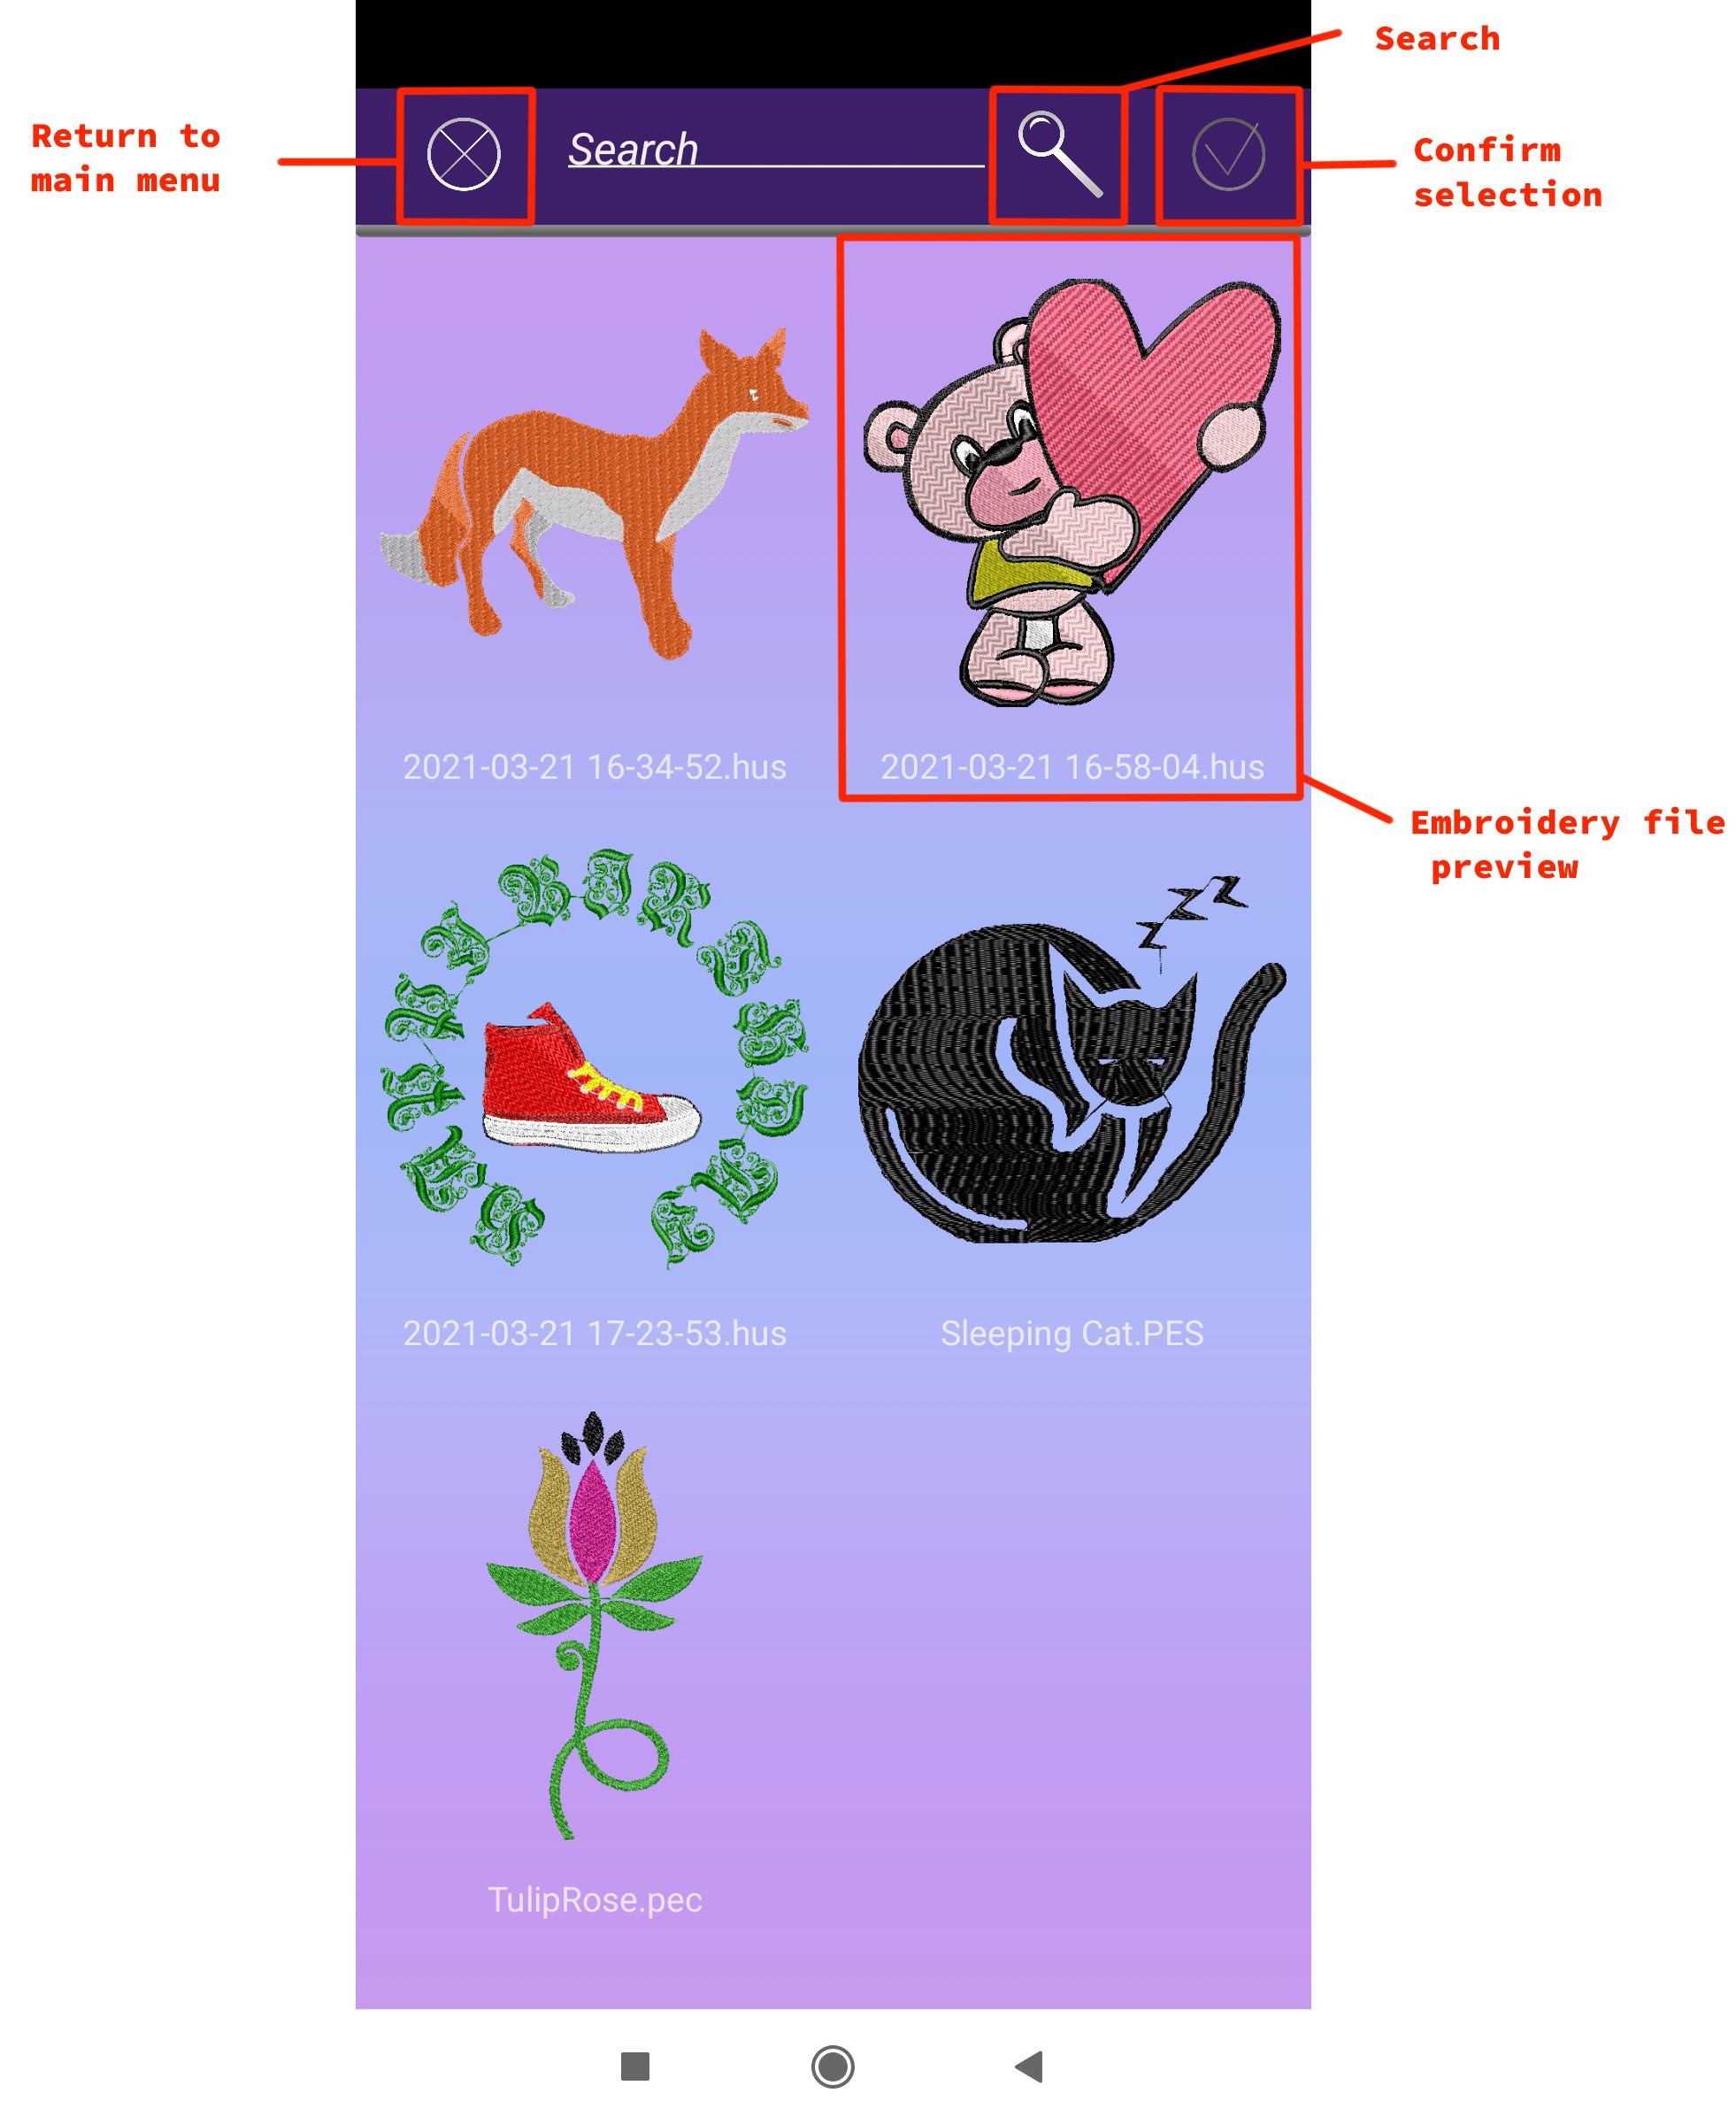
In the search overview all designs files found on your device will be listed as small preview icons. You can search for a specific file name by typing the name or a part of it in the “Search” bar and tapping on the magnifying glass icon.
Click and hold on an icon or click the Tick icon to open a design.
Click the Cross button to return to the main menu.
Pattern viewport (from left to right)
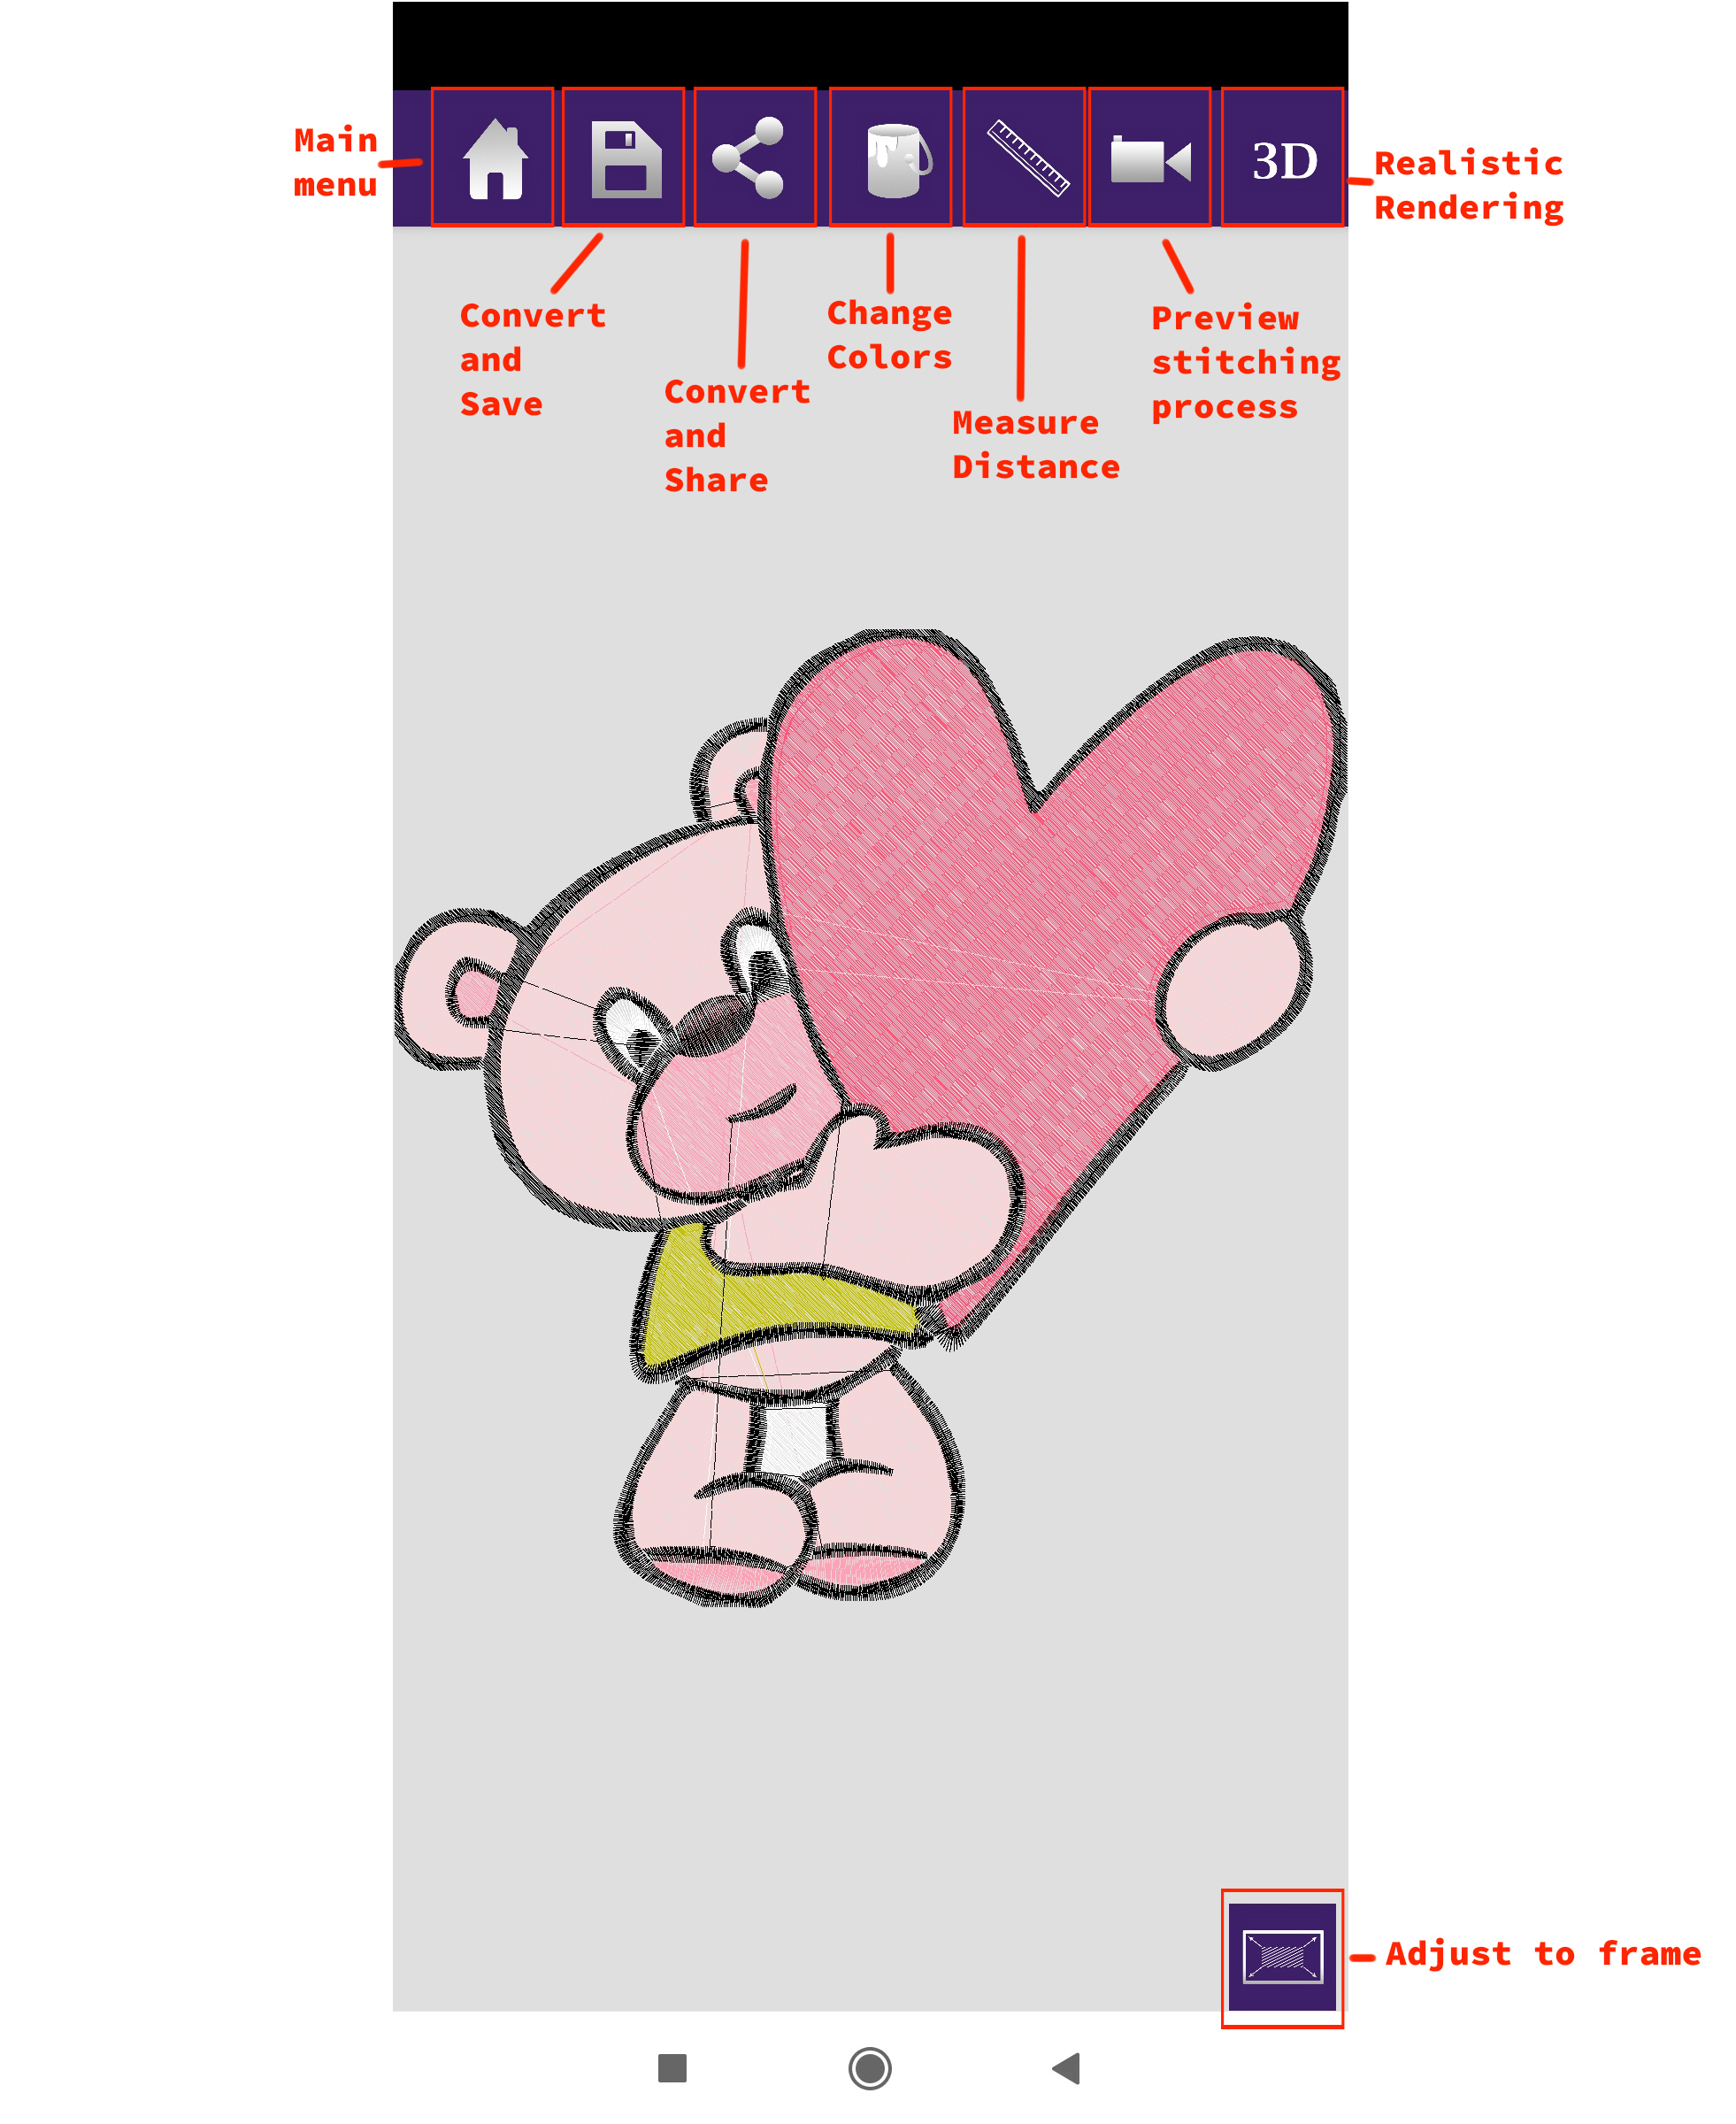
Click the Home icon to return to the main menu.
Click the Save icon to save the design on your device. The file will be saved/converted to the format you choose under your specified name. You can choose the saving location in the dropdown menu.
Click the Share button to save/convert the file and share it via a social network or app, Bluetooth or to pack it as a ZIP archive.
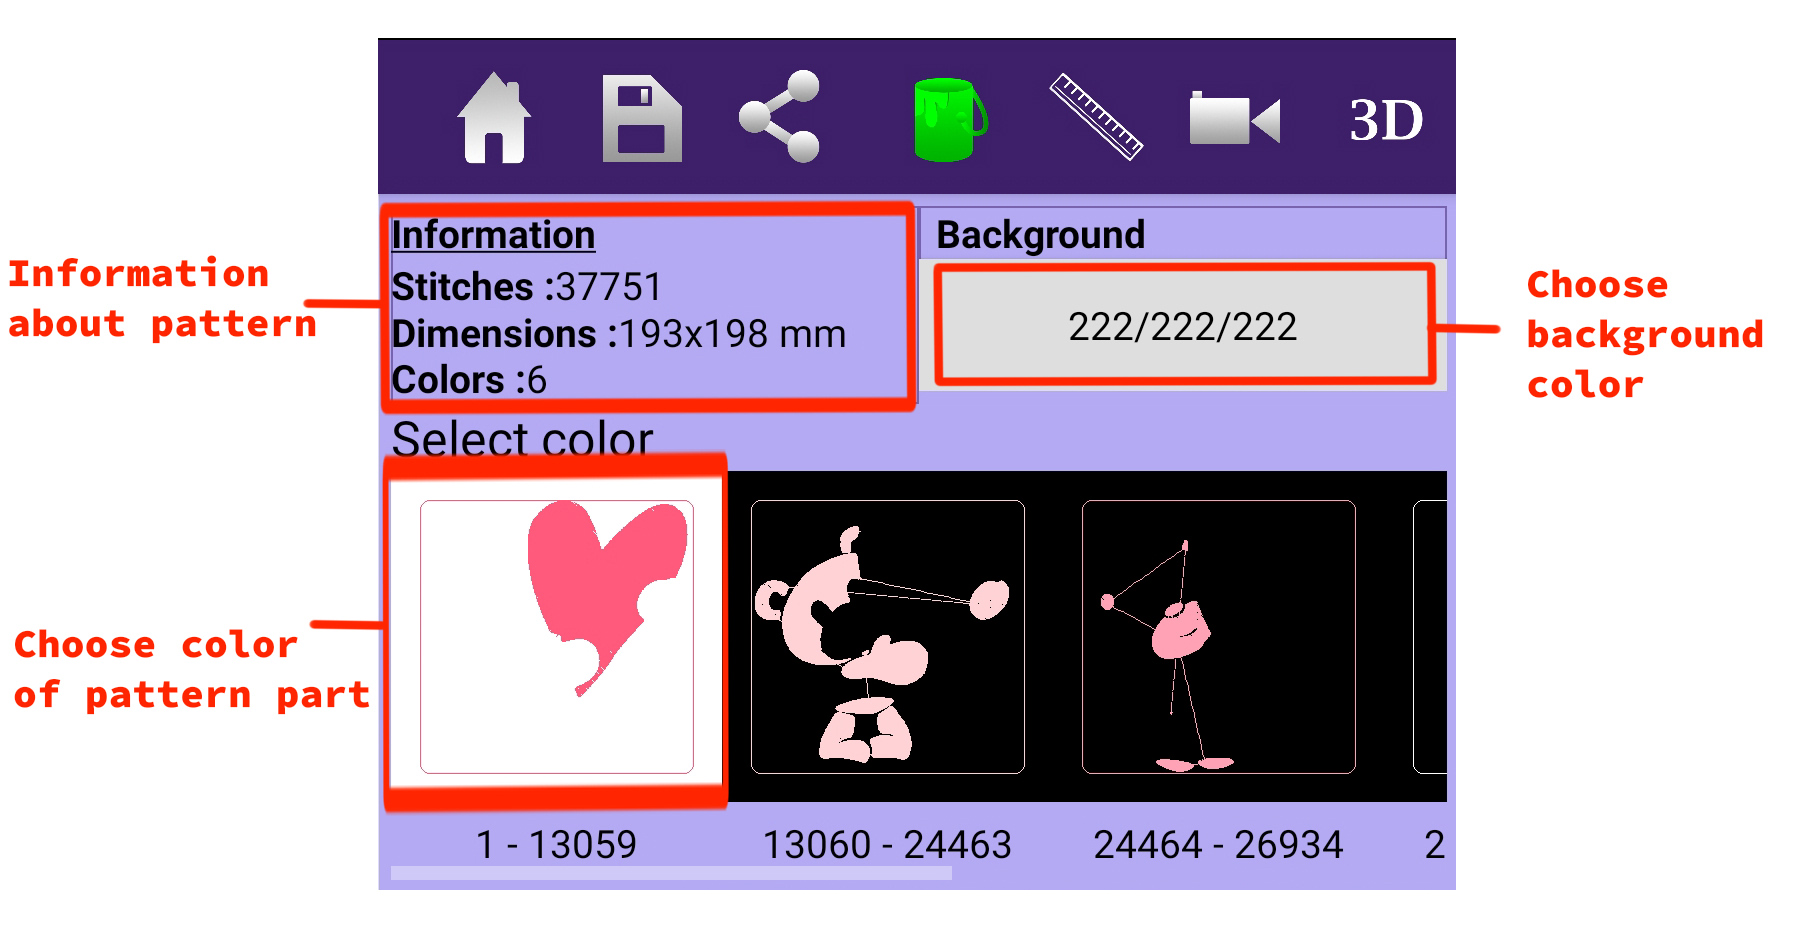
Click the Color button to change the color of your design. Click on one the listed embroidery parts and select the desired color in the opened color chart. You can also change the viewport background color and see information about the embroidery design (Amount of stitches, dimensions, colors)
Click the Ruler icon to measure distances in the window. Click and drag to measure the desired distance.
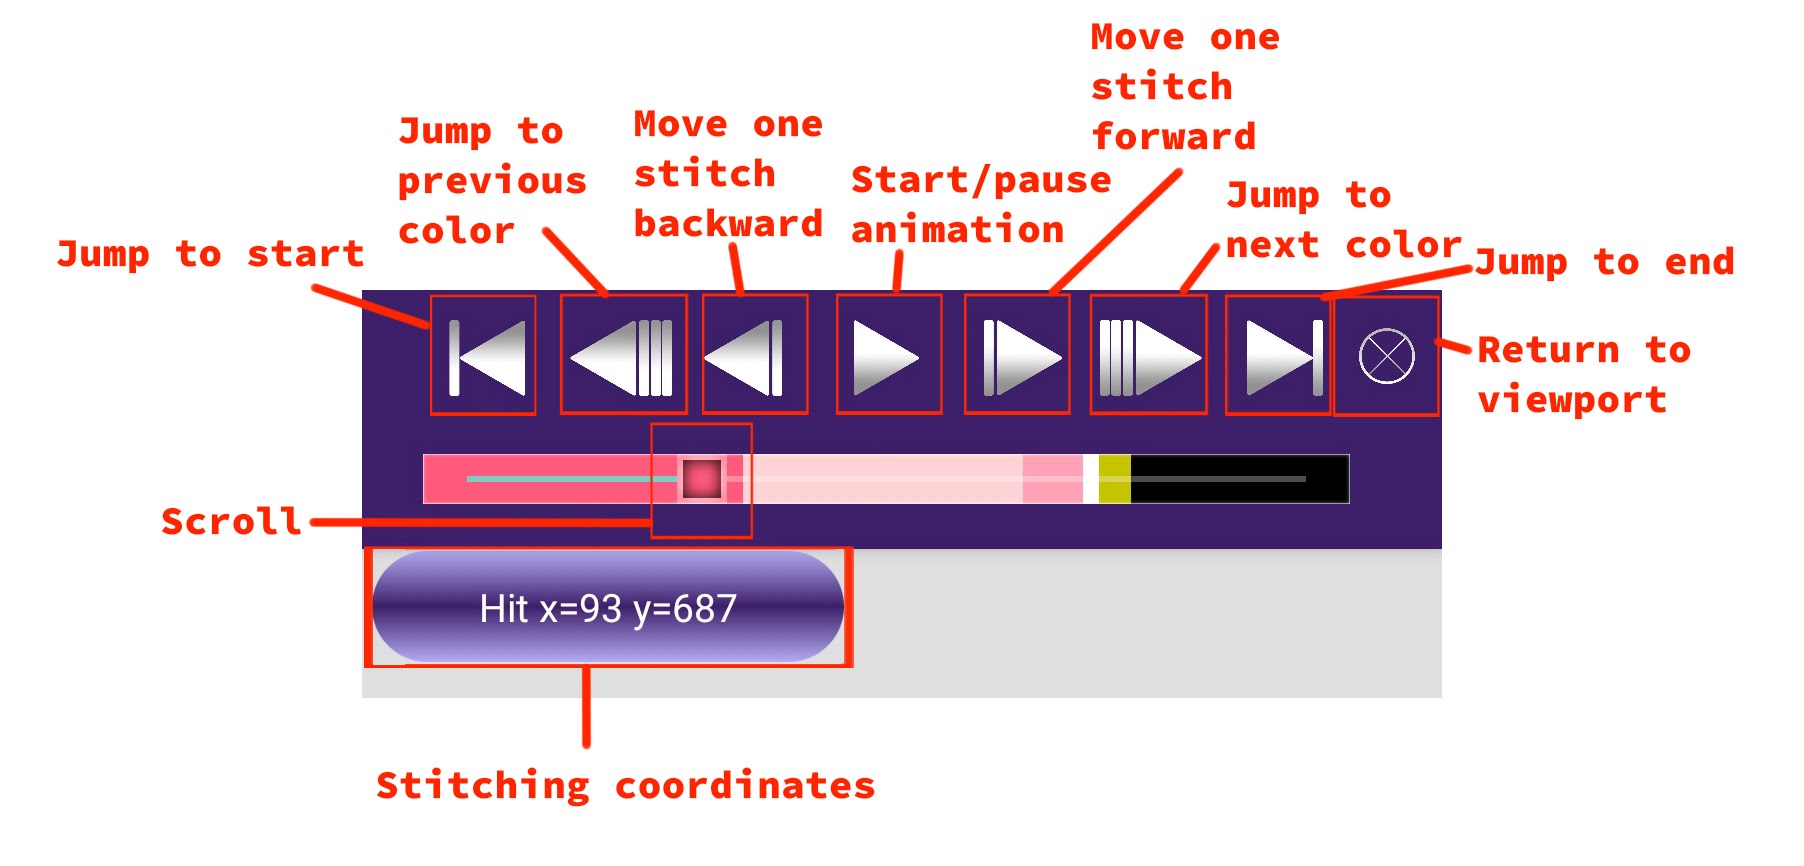
Click the Video icon to see an animation of the stitching process as a preview. Use the navigation buttons on top of the screen to start and pause the animation and jump between single hits, color parts and to the end or start of the process. Click the Cancel button to return to the main window.
Click the 3D button to see the design in a realistic rendering.
To cancel any button and return to the main window, click the button again.
To adjust the design to the screen size of your device, click the Frame button on the bottom right.


